Jankó Keyboard
This project has been quite a long-running one. I started it in high school and it has evolved over the years since then. Initially, it began simply as a project to build a keyboard in the Jankó layout, but it eventually grew to swallow another project I had going: building a polyphonic tone generator. From there it evolved into building a fully fledged Jankó synth, which is currently in progress.
So what's the story with this thing, then? Well, let's start at the beginning:
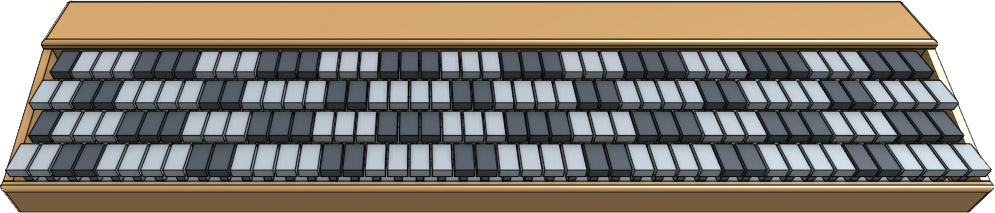
I decided I wanted to try out a Jankó keyboard, and the easiest (and/or most fun) way to do that seemed to be to build one, so I drew up a design in CAD:
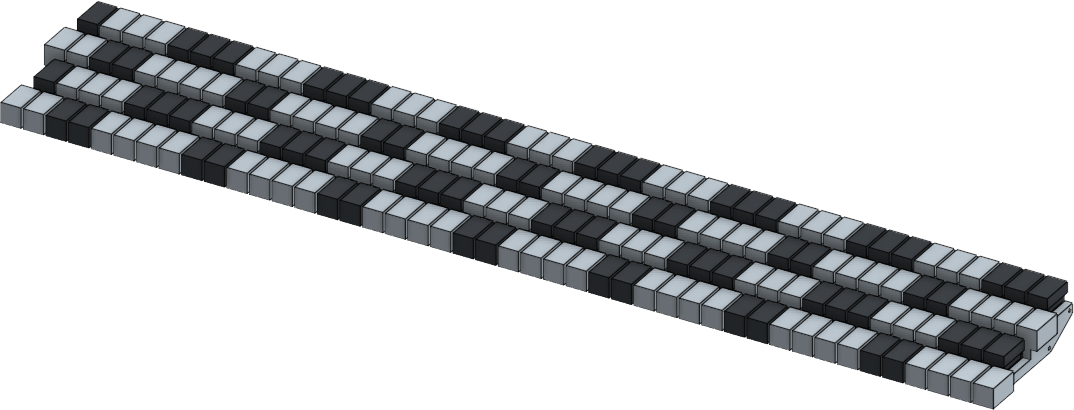
This is the layout I decided on. As you can see, it is an 88-note, 4-row design. In my research into Jankó keyboards, I found some that went up to five or six rows, but I figured four was enough for my purposes.
The whole thing, with all 88 keys, is only about a meter wide. Due to the arrangement of the rows and the way the keys are stacked, it only ends up being as wide as 44 keys, allowing the full pitch-range of a piano to be fit into a much smaller horizontal space, while still maintaining a normal key width.
With the keyboard layout sketched out, I then drew up a first version of the action for the keys:
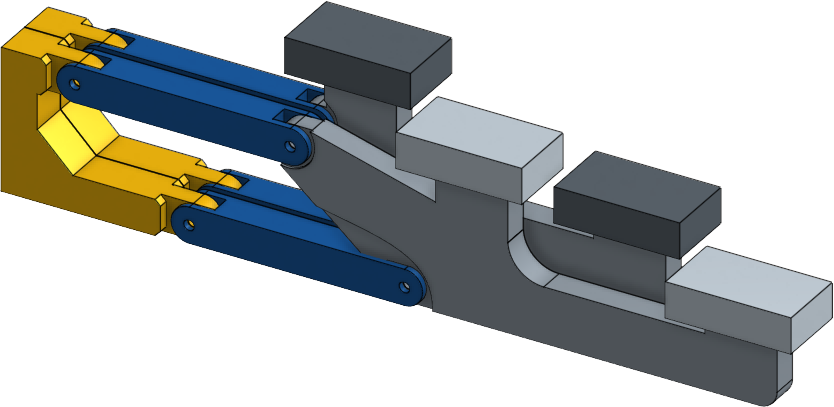
The design has since changed several times, but the basic idea remains. It uses the so-called "parallelogram design" based off of the Lippens keyboard, with some inspiration taken from this image on this page.
| the Lippens keyboard action | a Jankó action with some similarities |
I then set about stacking up my key design the appropriate number of times to make a full keyboard. Adding a case, the Version 1 CAD model looked like this:
part count: 617
In terms of sound, the plan at this point was to generate 88 simultaneous square waves using the technique showcased in this video, and to simply connect each of them to the output through the keyswitches. I built 4 notes of tone generators to test, but postponed building the others until I was sure of my design.
The project then sat on hold for a while. I fiddled with it here and there, but no significant progress was made. When I picked it back up in earnest, I decided it needed a bit of a redisign. I had commandeered it to be my senior project in college, so it needed to be somewhat more robust than just a test piece. This is also the point when it graduated from just a square wave machine to a full synthesizer. In the meantime, I had already explored the square-waves-direct-through-keys-to-output method with the ChairganSynth and determined that it wouldn't be ideal for a full 88-note keyboard.
At this point, the new plan was to include the original polyphonic square waves as one of three onboard sound sources, along with the monophonic Electric Druid VCDO and the programmable Teensy Audio Board, and to also include MIDI functionality. I started designing a mother-of-all-circuit-boards to take care care of the whole synth in one go, but soon realized that a more modular approach made more sense for what was still essentially a prototype. So, I designed a small board consisting of the previously tested 555 quare wave circuit, plus additional control circuitly. 15 of these were then ordered from JLCPCB.
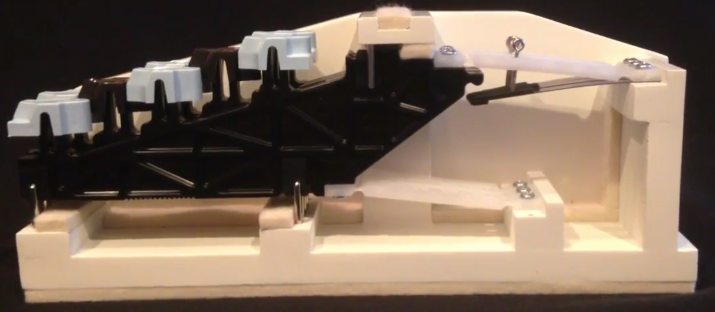
While waiting for the boards to arrive, I got back to CAD. I had made a prototype of one octave of the design above some months prior, which looked like this:
It was cut on a CNC router from some scrap 3/4in plywood (thicker than ideal, but free). As you can see, I didn't bother fully assembling it. I learned what I needed to know from the two keys I put together, namely that having the two parallel levers at the back led to uneven action, and that I really needed more the a millimeter of clearance between keys. Some things to remedy in the next design. It also became clear that single-sided machining on the CNC router was not the ideal way to make key parts, as they were a bit rough and couldn't have geometry with overhangs. As a solution to these issues, it was suggested that I laser cut the key mechanisms in layers instead.
Another thing that occured me is that internally in the electronics, 12*8 is cleaner than 11*8, to I decided to up the key count from 88 to 96, also utilizing the full 8 octaves of the tone generators. With these new consideratoins in mind, I redesigned the whole thing from the ground up.
part count: 1641
aka too many, but we'll get to that...
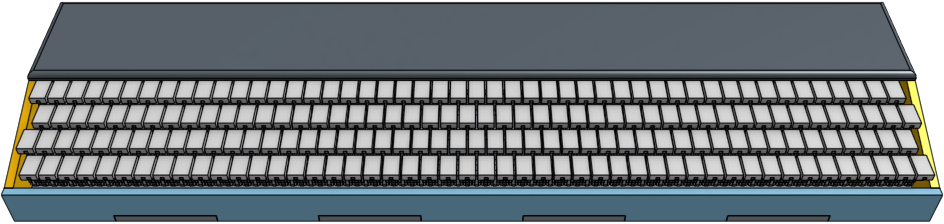
The redesigned, laser-cutter-able key mechanism looked like this:

As you can see, the parts are made from three layers: a 5mm layer sandwiched by 3mm layers. This allows for the pieces to be cut as simple profiles, while creating notches in the final part. The levers key into a notched bar that runs the length of the instrument, ensuring even spacing of the keys.
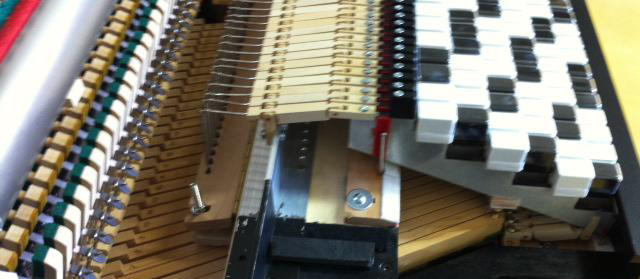
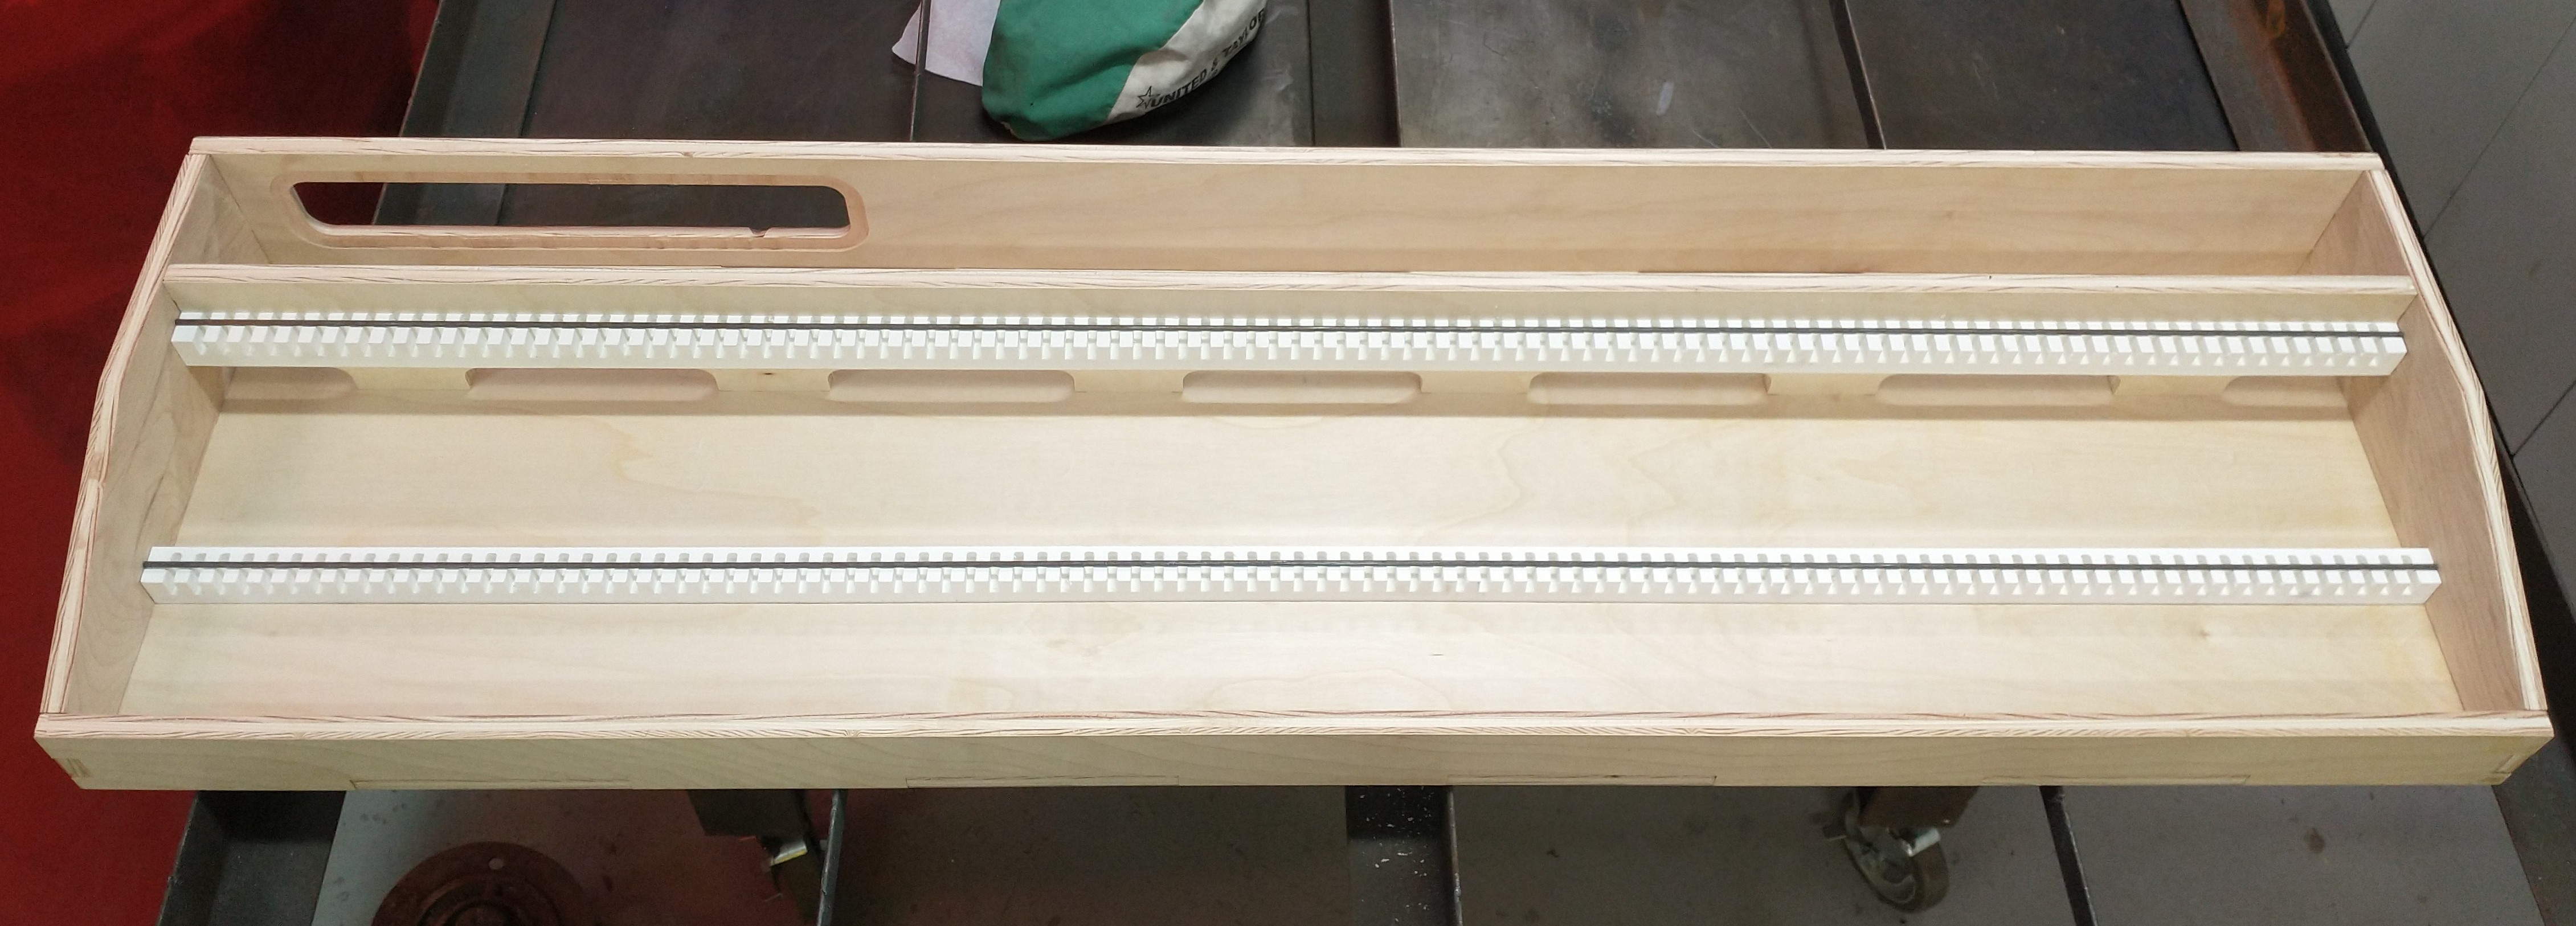
The shell of the instrument was cut from half inch birch plywood on the CNC router. The key mounting rails were cut from Azek on the same machine. Here they are assembled, with 1/8 inch steel rod as an axle:
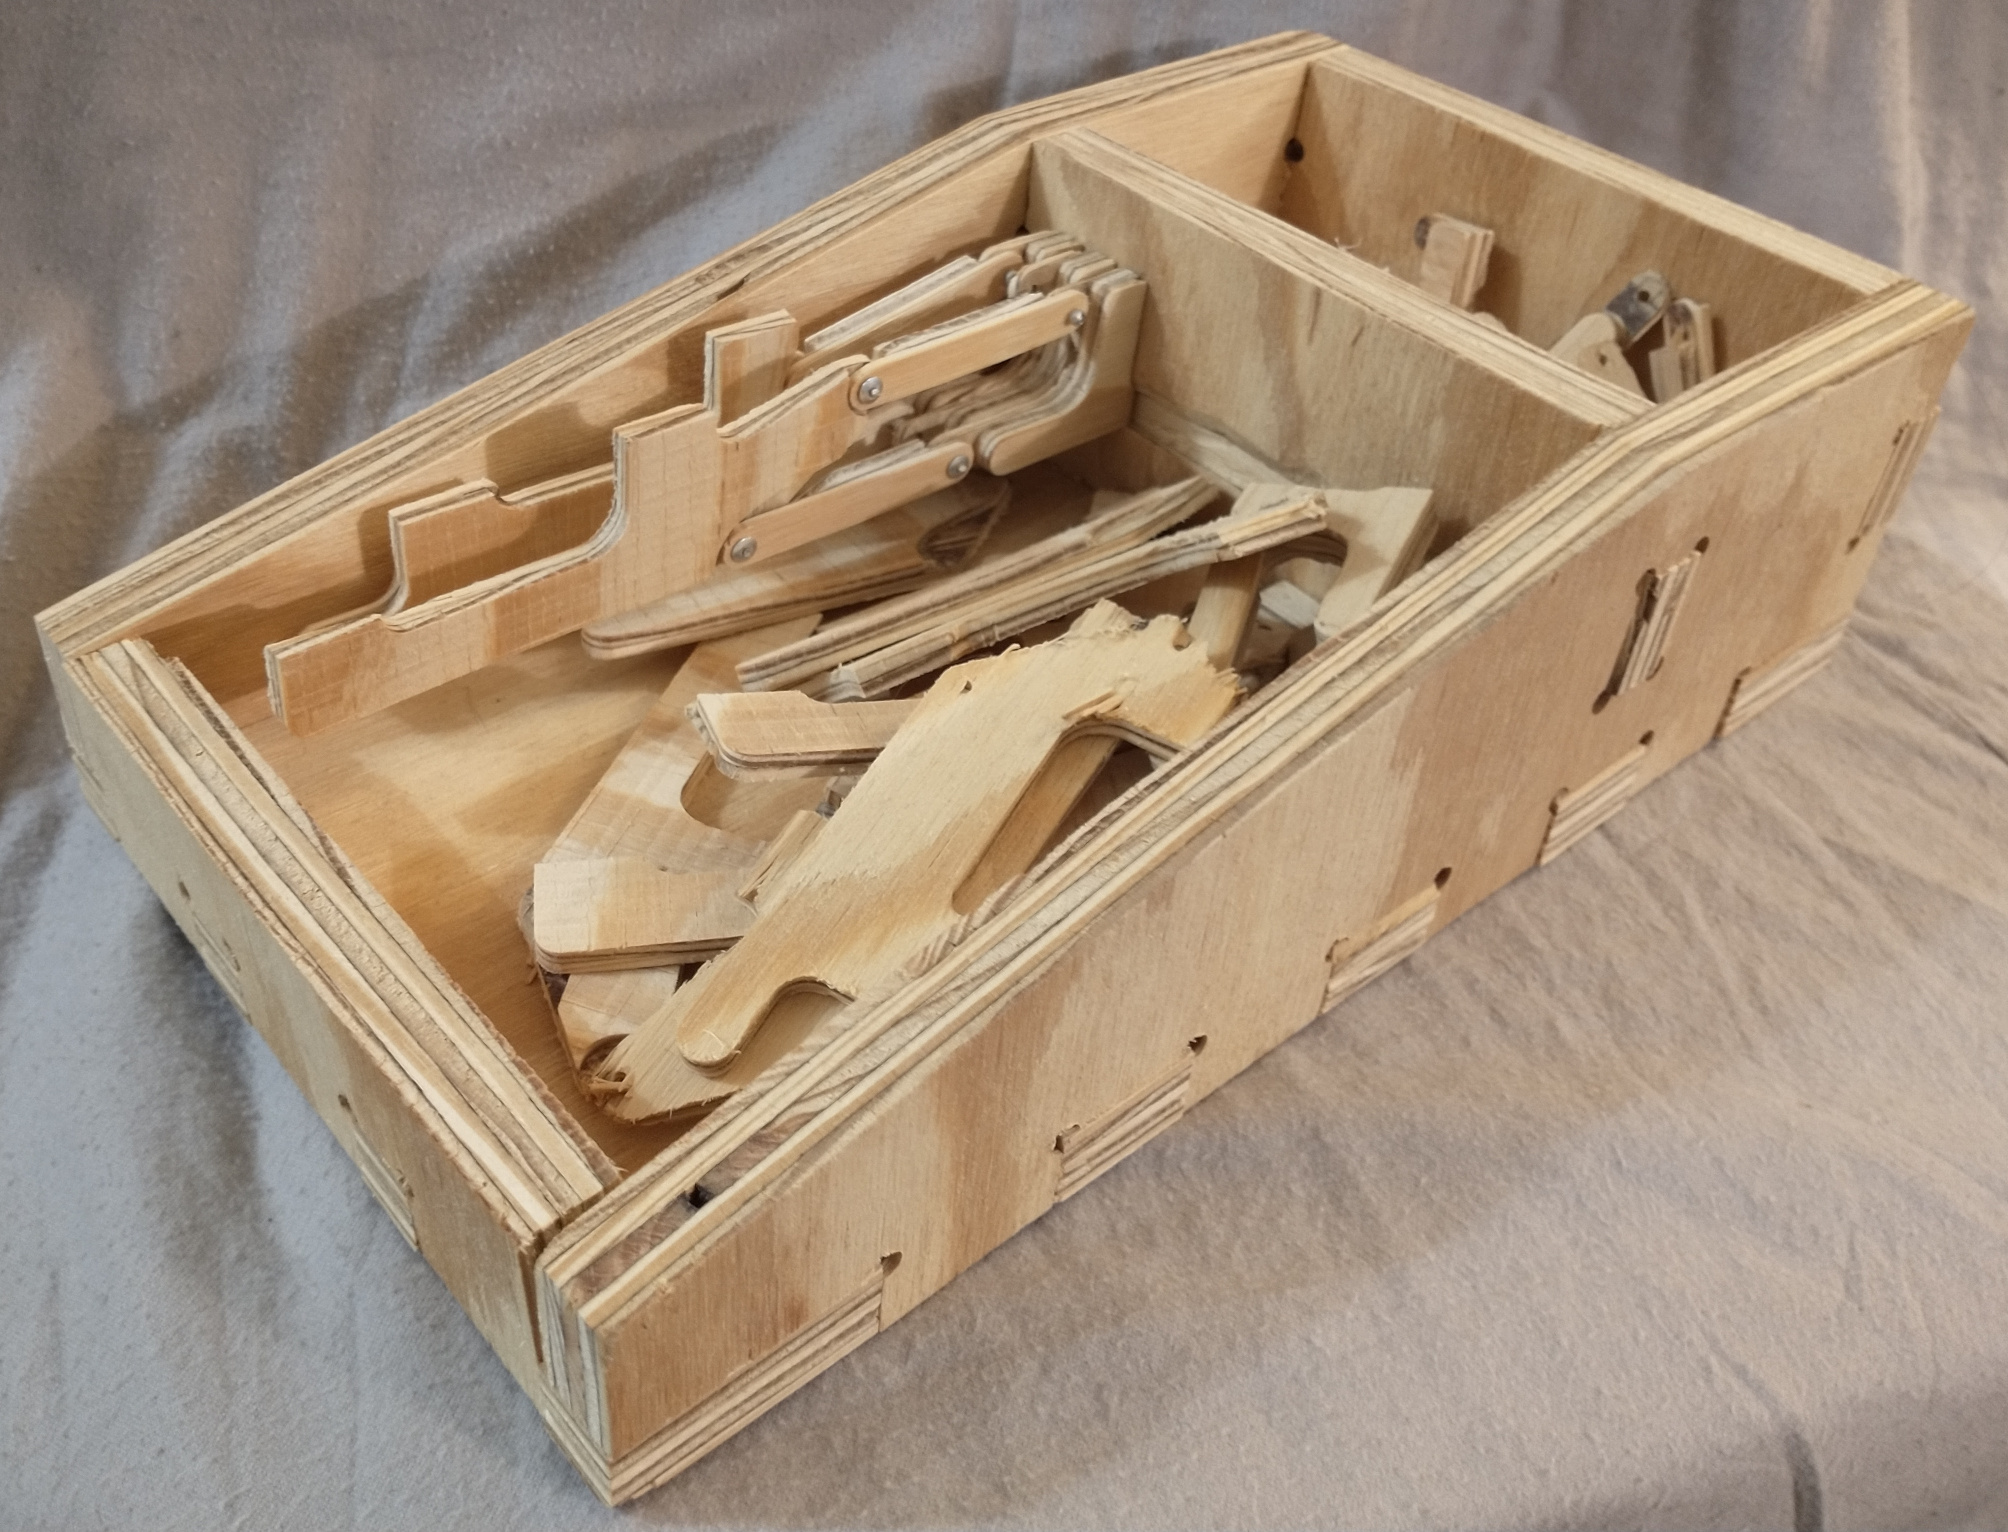
96 keys-worth of parts were also laser cut, but then I graduated, and they were relegated to a box in the basement, where they remained unassembled...
At this point, the project went on hold again for two years. One thing that I had learned when handling the key parts physically is that there was a major flaw in the key mechanism design. The spacing of the pivot arms, despite apparently working in that one Jankó piano, causes my mechanism to fold in on itself. So, armed with the perspective of some time away as well as seeing this project develop, I redesigned the mechanism, yet again.
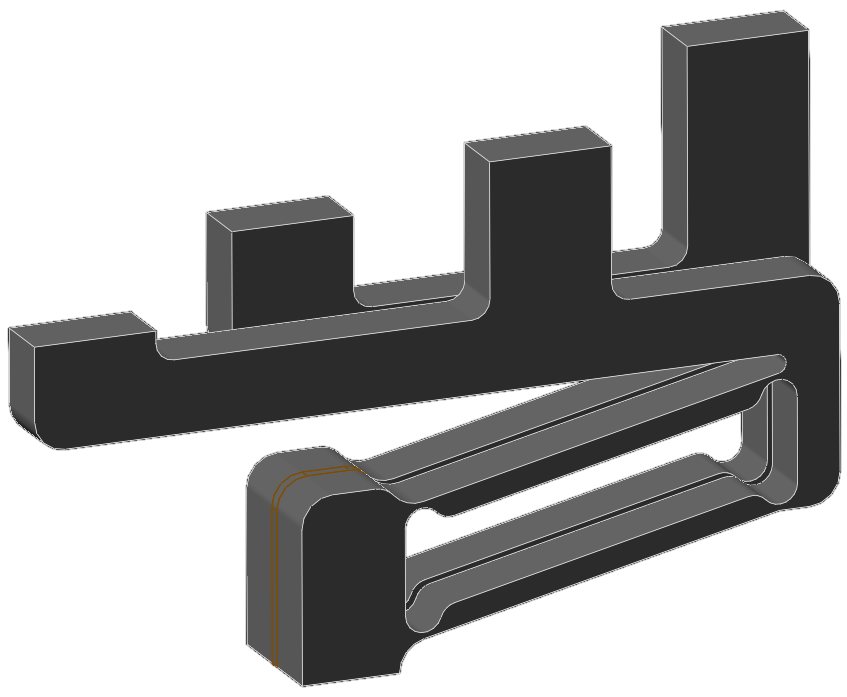
That's right, it's a flexure! If it works, this will allow me to reduce parts from 5 per key to 1 per key, greatly simplifying assembly. (Better 96 total key parts than 480!) It isn't any taller than the old design and also takes up less horizontal space, so win win.
However, because I already have the parts for the old design, I still plan to build as much of the keyboard as I can so I can learn the most from my mistakes. Then I'll make the new one with the improvements I learn of along the way.
In any event, I decided to run a quick and dirty 3D print of this new design to get a feel for it in the real world. And wouldn't you know it, it does the thing!
PLA definitely isn't the ideal material: it's a bit stiff, but I didn't design this to be 3D printed anyway. If I can find a suitible material, I think laser cutting might be a better option for making 96 of these.
Nonetheless, having a prototype in my hands is very informative. Currently it's just screwed to that piece of wood from the bottom, but the gears are already turning for a more elegant mounting solution. The other thing this has revealed is that the plastic springs back more effectively than I had guessed. I may in fact be able to eliminate the metal springs from my design if I design the flexure right.